How to Customize Odoo Community Edition

Odoo Community Edition is a highly flexible and open-source ERP system that allows businesses to tailor the software to meet their specific needs. Customizing Odoo can range from simple changes like renaming fields to creating completely new modules for specific business processes. This guide will walk you through the key methods to customize Odoo Community Edition without diving too deep into complex technical details.
1. Enabling Developer Mode

Before you can start customizing Odoo, you need to enable Developer Mode. This unlocks advanced features that let you make structural changes to the system.
To enable developer mode:
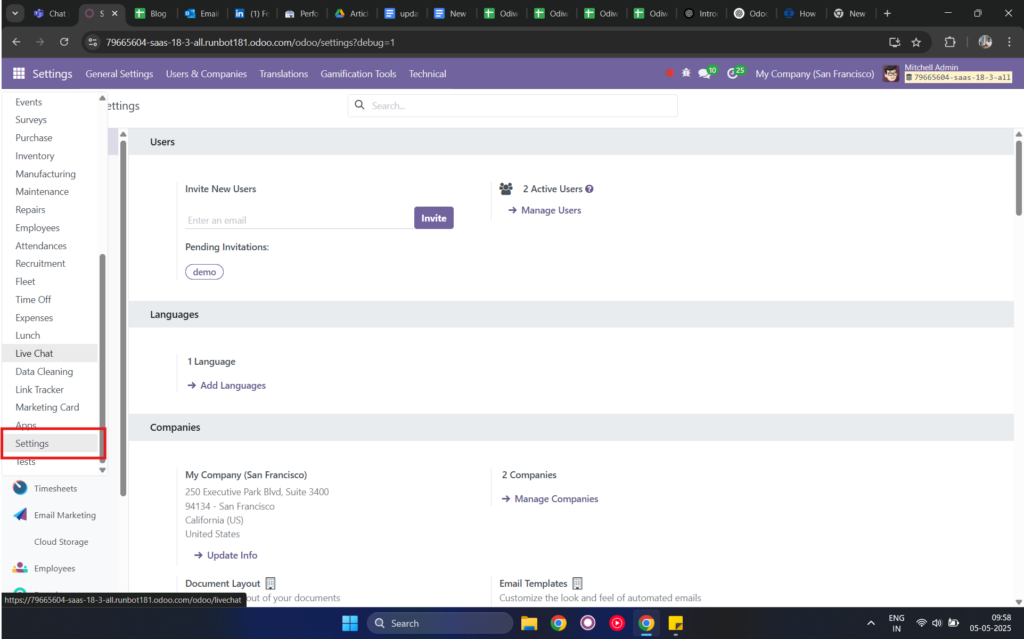
- Go to Settings.
- Scroll down to the bottom and click Activate Developer Mode.
With Developer Mode activated, you now have access to advanced settings, options, and views that allow for customization.
2. Customizing Without Coding

Even without coding skills, you can make basic customizations to Odoo. Some of the things you can do include:
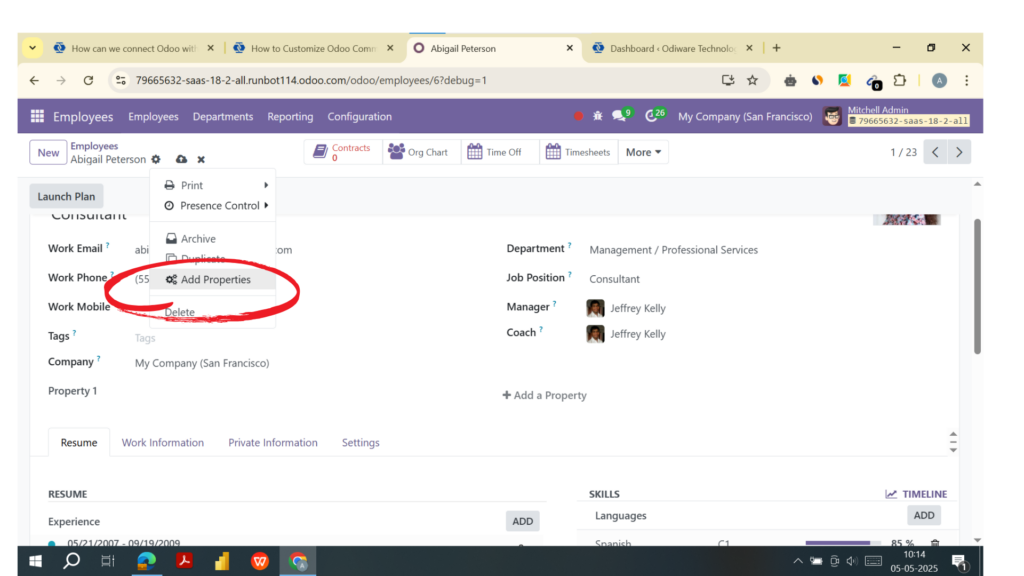
a. Adding New Fields

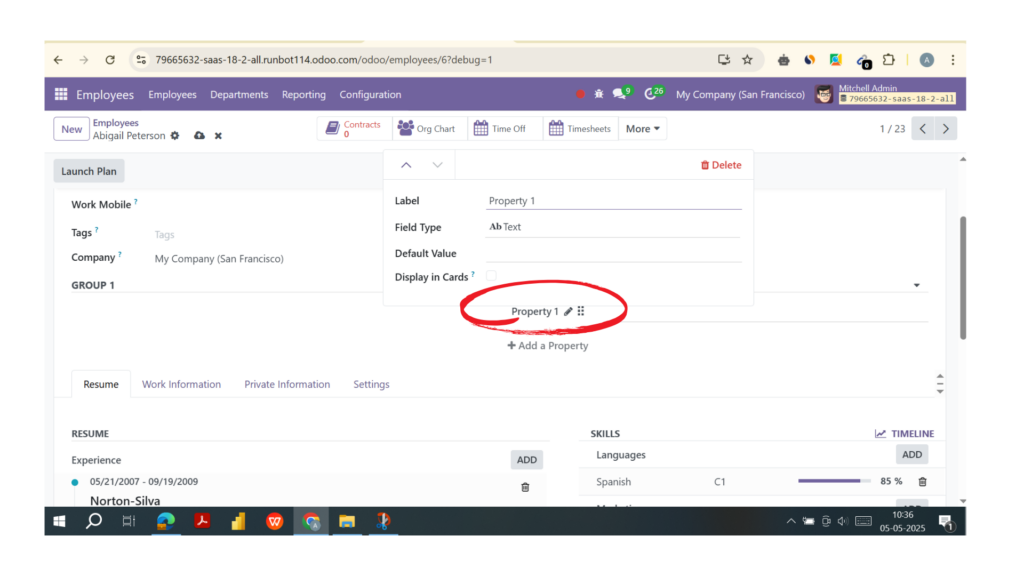
Adding custom fields can help you capture additional information that the default Odoo system might not include. To do this:
- Go to the form where you want to add a new field.
- In Developer Mode, click on the three dots in the form and select Edit Form View.
- Choose Add Field, then select the field type (text, date, number, etc.).
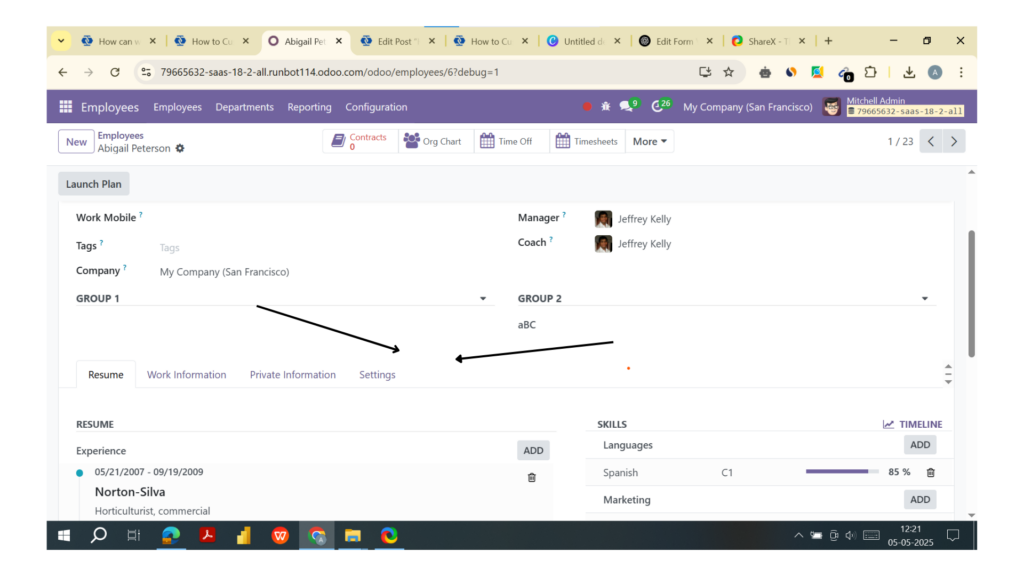
- Save your changes, and the new field will appear in your form.
b. Renaming Fields

You may want to change the labels of certain fields to match the terminology used in your business. Renaming fields is simple:
- Navigate to the form where the field exists.
- In Developer Mode, hover over the field and click the settings icon (gear icon).
- Rename the field label, and save your changes.
c. Changing Form Layouts

Odoo allows you to adjust the layout of forms to suit your business needs. You can reorder fields, hide unused fields, or create new sections to make data entry easier.
- In Developer Mode, go to the form you want to edit.
- Click on the gear icon and choose Edit Form View.
- From here, you can drag and drop fields or add new tabs and sections.
3. Advanced Customization Through Module Development

For more complex customizations, such as adding new functionalities or modifying workflows, you will need to develop custom modules. This requires knowledge of programming in Python and using XML for the interface design. Here’s an overview of the steps to create a custom module:
a. Create the Module Structure
To start, create a new directory for your module within the Odoo addons folder. The structure of your module should include:
- __manifest__.py (for module metadata)
- __init__.py (for module initialization)
- models.py (to define new models and business logic)
- views.xml (to define form views and layouts)
b. Write the Manifest File
The __manifest__.py file contains information about your module, such as its name, version, author, and the modules it depends on. Here’s a simple example:
{
    'name': 'Custom Sales Module',
    'version': '1.0',
    'author': 'Your Name',
    'depends': ['sale'],
    'data': ['views/sale_order_view.xml'],
}
c. Define Models and Business Logic
In models.py, you can extend Odoo’s existing models or create entirely new ones. For example, if you want to add a new field to the Sales Order model, you can do something like this:
from odoo import models, fields

class SaleOrder(models.Model):
    _inherit = 'sale.order'

    custom_field = fields.Char(string='Custom Field')
d. Customize Views
In views.xml, you can define how your customizations will appear in the Odoo interface. For example, to add the new field to the Sales Order form:
<record id="view_order_form_inherit" model="ir.ui.view">
    <field name="name">sale.order.form.inherit</field>
    <field name="model">sale.order</field>
    <field name="inherit_id" ref="sale.view_order_form"/>
    <field name="arch" type="xml">
        <xpath expr="//field[@name='partner_id']" position="after">
            <field name="custom_field"/>
        </xpath>
    </field>
</record>
e. Installing Your Custom Module
Once your module is ready, you need to install it in Odoo:
- Navigate to Apps in Odoo.
- Click Update Apps List.
- Find your custom module and click Install.
4. Customizing Reports

You can also customize the reports generated by Odoo, such as invoices or sales orders. Odoo uses QWeb (an XML templating engine) for report generation. To customize a report:

- Go to Settings > Technical > Reports.
- Choose the report you want to modify and edit its QWeb template to match your requirements.
For example, if you want to add a new field to your invoice report, you can modify the template by adding your custom field’s reference.
5. Using Third-Party Modules

If developing custom modules sounds too complex, Odoo’s App Store offers many third-party modules that provide additional functionalities. You can browse through the available modules to see if there’s a ready-made solution that fits your needs, which can save you time and effort.
Conclusion
Customizing Odoo Community Edition allows businesses to tailor the software to their specific processes. Whether you’re making simple adjustments like adding fields or developing entirely new modules, Odoo’s flexibility makes customization possible for a wide range of business needs. While basic customizations are achievable without programming, more complex changes may require knowledge of Python and XML. If you’re unsure about developing custom modules, consider using third-party apps or seeking help from an Odoo expert.

If you need assistance customizing your Odoo system, Odiware specializes in helping businesses customize and implement Odoo ERP.
- Mail: sales@odiware.com
- Phone Number: +91 86608 65440
- Website:Contact


2 thoughts on “How to Customize Odoo Community Edition”
Comments are closed.