
Payroll is one of the most critical HR functions for every organization — ensuring employees are paid accurately, compliantly, and on time. With Odoo Payroll, businesses eliminate spreadsheets, reduce manual errors, and automate complex salary computations — all within a fully integrated ERP system.
This comprehensive guide explains everything you need to know about Odoo payroll — from setup and configuration to advanced automation, reporting, compliance, and real-world implementation tips.
What is Odoo Payroll?
Odoo Payroll is a full-featured payroll management application within the Odoo HR suite. It seamlessly integrates with Employees, Attendance, Time Off, Accounting, and other modules to automate payroll processing and ensure accurate compensation.
Core Functions of Odoo Payroll
- Automatic salary calculations based on employee contracts and attendance
- Payslip generation and distribution
- Statutory deductions (tax, PF, ESI, etc.)
- Integration with accounting for journal entries
- Support for global payroll rules and localizations
Businesses — from startups to large enterprises — leverage Odoo payroll to simplify HR operations and ensure compliance with labor regulations worldwide.
Key Odoo Payroll Features That Drive Business Value
Understanding Odoo payroll features is essential to maximize returns on your HRMS investment.
1. Automated Salary Computation
Payroll formulas automatically calculate wages, allowances, deductions, and taxes based on pre-configured rules — no manual spreadsheets required.
2. Payslip Generation & Distribution
Generate payslips individually or in batches and send them securely via email or the employee portal.
3. Seamless HR & Accounting Integration
Payroll entries can automatically generate accounting journal entries, reducing reconciliation errors.
4. Localisation & Compliance
Support for country-specific payroll rules ensures compliance with statutory obligations. For example, Indian payroll localization handles allowances, statutory deductions, and employer contributions.
5. Advanced Reporting & Analytics
Track totals, tax summaries, cost centers, and payroll trends to make data-driven decisions.
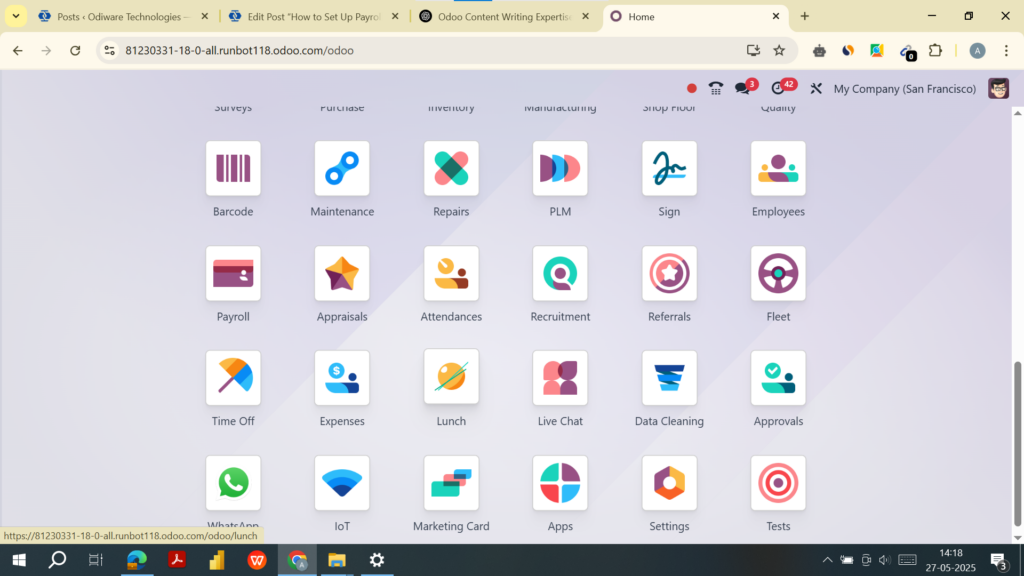
Step-by-Step Odoo Payroll Setup
Below is a detailed guide to implementing payroll in Odoo — crafted for beginners and HR administrators alike.
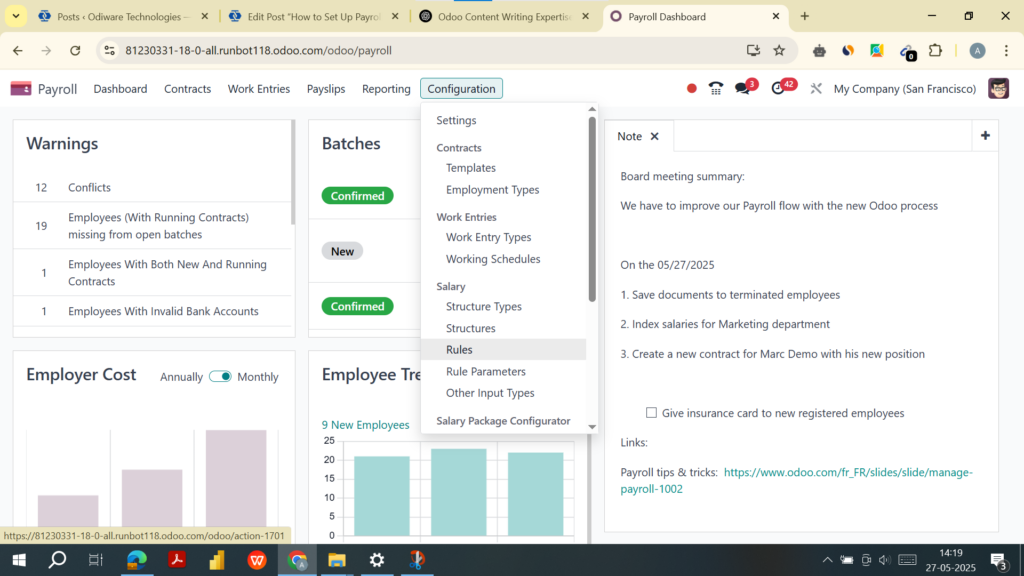
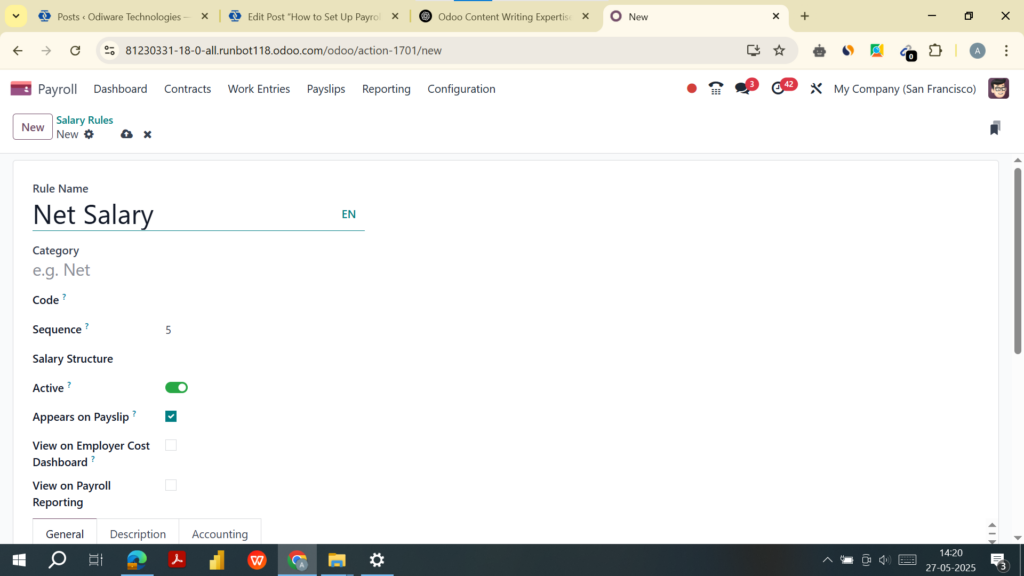
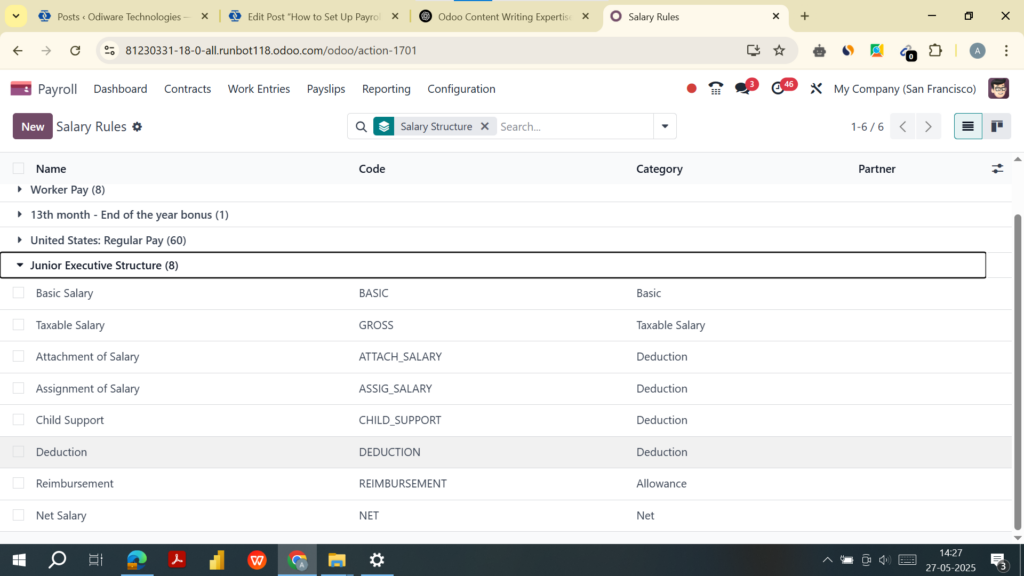
Step 1: Configure Salary Rules
Path: Payroll → Configuration → Salary Rules
- Click Create.
- Enter:
- Name (e.g., Basic Salary, HRA, Provident Fund).
- Category: Assign a logical group (Allowances, Deductions, etc.)
- Code: Use short, unique codes (e.g., BASIC, HRA).
- Computation Type:
- Fixed: For fixed amounts.
- Percentage: Of another component (e.g., 10% of BASIC).
- Python Code: For advanced logic.
- Add conditions (e.g., only applicable to full-time employees).
- Define Accounting Information: Debit and Credit accounts if linking to the accounting module.
Step 2: Set Up Salary Structures
Path: Payroll → Configuration → Salary Structures
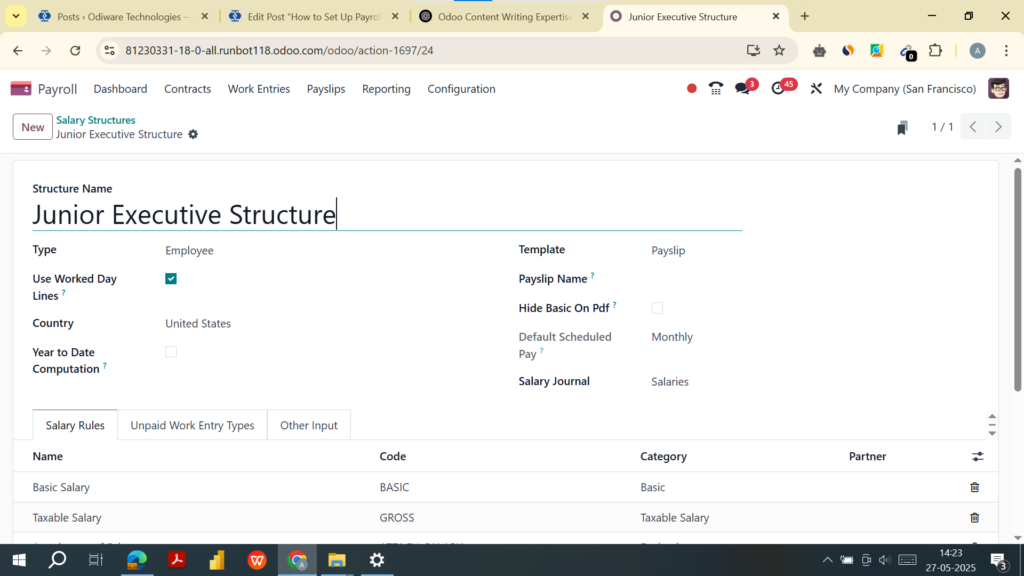
- Click Create.
- Enter:
- Name (e.g., Junior Executive Structure).
- Type: Employee.
- Assign Salary Rules using the “Add a line” button.
- Set Company, Working Schedule, and Structure Type.
- Enable Use Worked Day Lines to integrate with attendance or timesheets.
Step 3: Link Salary Structures to Employee Contracts
Path: Employees → Select Employee → Contracts Tab → Create
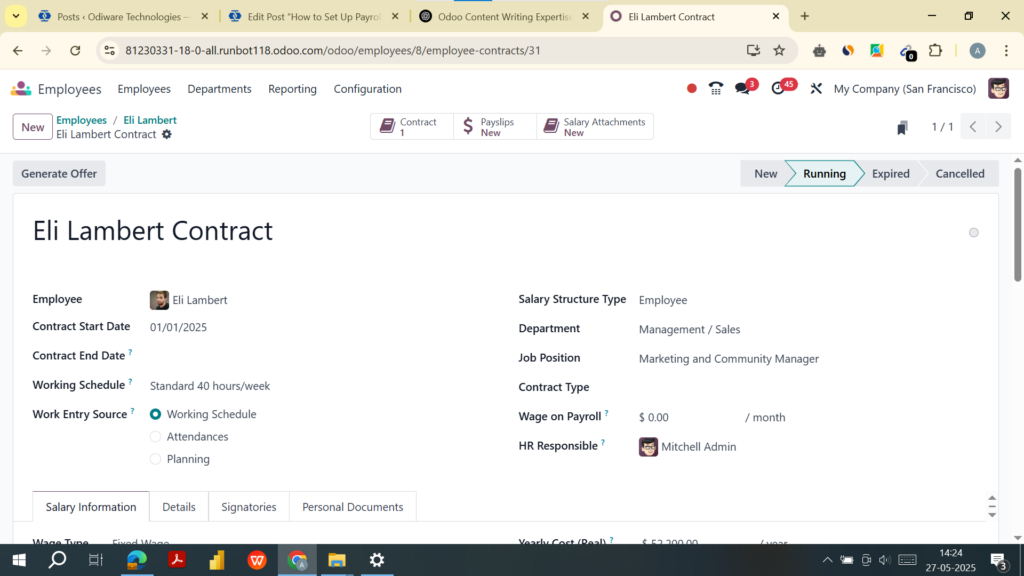
Set up:
- Start Date, End Date (if applicable)
- Wage Type (Monthly, Hourly, etc.)
- Salary Structure (Select from step 2)
- Working Hours (if hourly-based)
- Bank Account Details
Ensure status is set to Running for payroll to process.
Step 4: Configure Accounting Integration
Path: Payroll → Configuration → Settings
- Check Generate Accounting Entries.
- Enable Analytic Accounting (optional for departmental cost tracking).
- Set a default Payroll Journal (e.g., Payroll Expenses).
You must define journal accounts under: Payroll → Configuration → Salary Rules → Accounting section. This ensures payroll expenses automatically appear in your general ledger.
Step 5: Generate Payslips
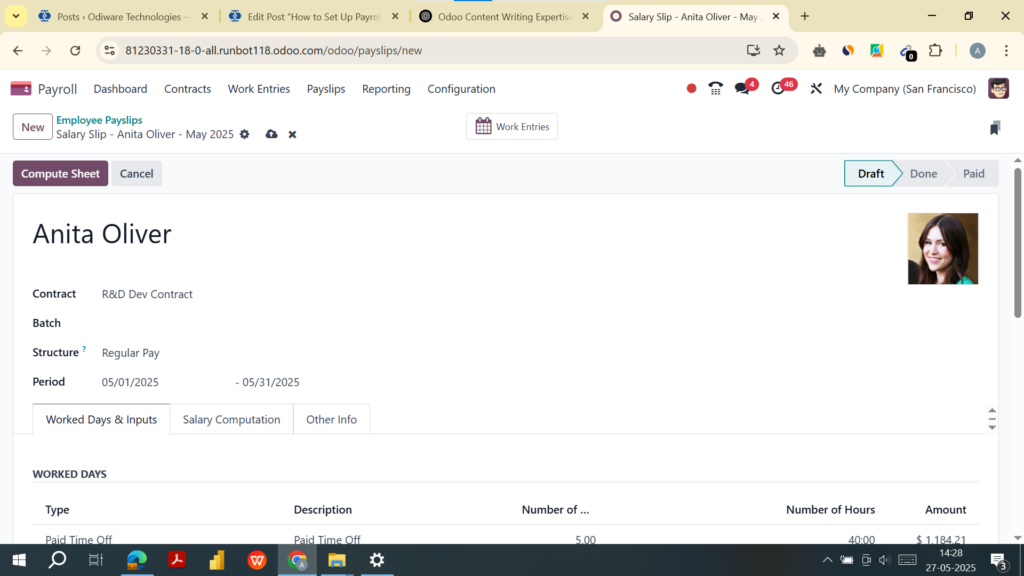
Path: Payroll → Payslips → Create
- Select an employee.
- Enter:
- Period (start and end date).
- Structure (auto-fetched from contract).
- Click Compute Sheet to preview breakdown.
- Click Confirm to validate the payslip.
- Optionally, click Mark as Paid and Send by Email.
📌 Use “Batch Payslips” for bulk processing:
Payroll → Payslips Batches → Create
Step 6: Automate Payroll Processing
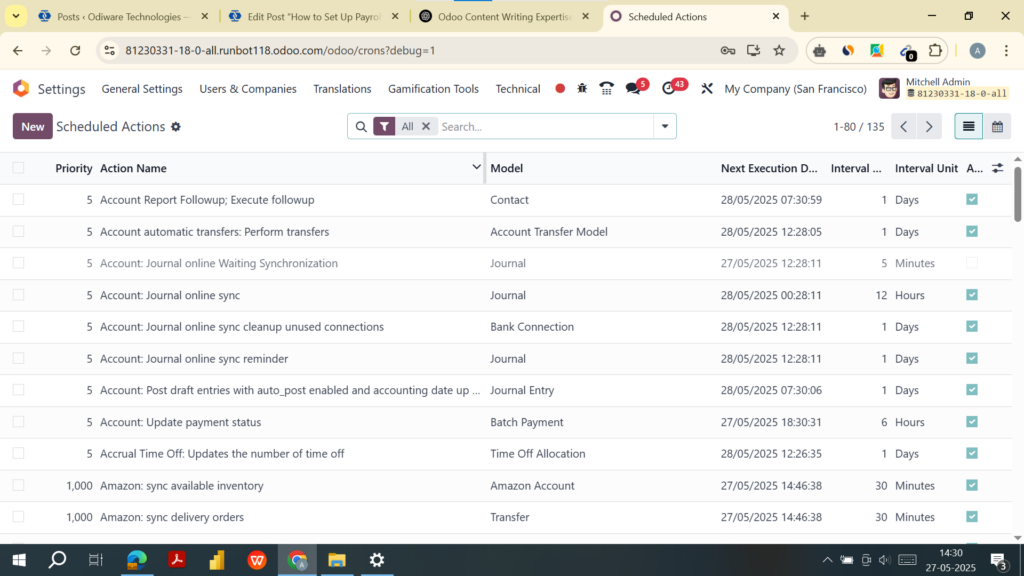
Enterprise-exclusive features include:
- Scheduled Actions to run payroll monthly:
Settings → On The Developer Mode -> Technical → Automation → Scheduled Actions - Automated Bank File Generation: Enable SEPA or use localized bank formats. Go to Payroll Settings to enable bank integration.
Step 7: Generate Reports
Path: Payroll → Reporting

Available reports:
- Payroll Summary
- Employee Payslip History
- Deductions Summary
- Tax Reports
- Journal Entries (from Accounting)

Start streamlining your payroll processes now and experience seamless payroll automation. Contact Odiware Technologies for more information.
📞 Phone: +91 86608 65440
📧 Email: sales@odiware.com
🌐 Website: www.odiware.com
Don’t let compliance stress hold your business back. Partner with Odiware and ensure your HR processes are compliant, efficient, and future-ready.